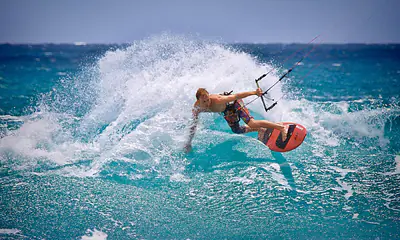
How to Tack in Kitesurfing — Transition Technique Guide
A tack in kitesurfing is a 180-degree turn executed by pivoting your board around its centre whilst redirecting the kite. Unlike a gybe (which is wider and uses the kite's power differently), a tack is a sharp, controlled transition where you keep the kite working and rely on rail pressure and board pivot to spin. It's one of the two essential directional changes every rider needs--and once you nail the how to transition tack kitesurfing technique, it becomes your go-to move in tight conditions or when you need to change direction quickly without losing momentum.
The Full Answer
In kitesurfing, a tack is a counterintuitive skill that feels backwards at first, which is exactly why so many beginners struggle with it. The key concept: your board turns, the kite keeps flying. You're not turning your body and kite together like you might assume--instead, you're using the kite as a lever to stay upright while your feet do the heavy lifting below the board. The kite moves to the new side of the window after the turn, not before it.
The physics are simple: as you pivot your board 180 degrees, you shift your weight to the edge (rail) closest to your intended turn direction, compress your legs, and let the board's shape work for you. The kite climbs slightly during the turn to maintain tension and lift, which keeps you from falling into the water. Once your board has rotated, your new leading edge is now your trailing edge, and you're riding away on the opposite tack with the kite repositioned on the opposite side of the window.
What makes this different from a gybe is the radius: a tack is tight and snappy, often performed in gusty conditions or crowded areas where you can't afford the wide, sweeping arc a gybe requires. It demands precision timing and body awareness, but it's faster to learn than you'd think. Most intermediate riders pick it up within a dozen tries once they stop overthinking the kite's movement.
Practical Guide
- Set up your approach -- Ride on a clear, flat edge at moderate speed with the kite at 11 o'clock (or 1 o'clock, depending on which way you're turning). Your weight should be balanced and forward on the board; don't be too far back.
- Initiate the pivot -- Push down hard on your front-side rail (the edge facing your turn direction), shift your weight over it, and compress your legs. This pressure is what rotates the board--not the kite.
- Climb the kite -- As your board starts to turn, move the bar back slightly to steer the kite upwind (toward 12 o'clock). This lifts you and reduces water resistance, making the pivot faster. Don't yank it--smooth, deliberate movements work better.
- Complete the 180 -- Keep your eyes on the horizon to track your rotation. Lean into the turn and let your front foot guide the pivot. When you've rotated 90 degrees, you're halfway there; keep the momentum going.
- Land on the new tack -- As your board faces the opposite direction, reset your stance: new front foot forward, new edge engaged. The kite should now be on the opposite side of the window at roughly 1 o'clock (or 11 o'clock).
- Bring the bar forward -- Once you've landed the turn, move the bar forward to rebuild speed and get the kite flying normally again. You should feel tension and acceleration immediately.
Common Mistakes
Many riders steer the kite first, thinking it will initiate the turn. This slows everything down and often stalls the kite. The board must lead; the kite follows your board rotation, not the other way around.
If you rely only on the kite to rotate you, you'll lose board control and often fall. The power comes from your legs and edge pressure. The kite is just there to keep you upright and floating.
Your eyes should stay on the horizon or your target direction. Looking down breaks your balance and throws off your spatial awareness, making the pivot feel uncontrolled.
Tacking is harder in light wind because the kite has less pressure to hold you up during the pivot. Build confidence in 12-18 knots before testing your tack in gusty 10-knot days.
Gear That Makes Tacking Easier
Your kite choice directly affects how forgiving a tack feels. Responsive, predictable kites that don't require aggressive steering make the how to transition tack kitesurfing technique much more intuitive. Look for modern designs with quick depower and stable flight characteristics.
The Neo is a neutral, forgiving all-rounder that responds instantly to bar input without lag. It climbs smoothly on tacks and maintains tension even in variable conditions. Perfect for learning tack timing without fighting the kite.
If you prefer a slightly smaller, more manoeuvrable feel, the Duotone Dice SLS range is equally excellent for practising transitions. Both designs reduce the learning curve and let you focus on body mechanics instead of fighting unresponsive kite behaviour.
Ready to Master Your Tack?
Expert advice, authorised stock, ships across Europe within 24h.